Posts Tagged ‘linux’

함수의 리턴 주소 알아내기

월요일, 3월 23rd, 2009

프로파일링이나 함수 래핑으로 lock등의 작업을 가로채서 로깅할 때 호출한 쪽의 PC값을 알고 싶을 경우가 있습니다.

현재실행되는 함수 입장에서 보면 리턴 주소이죠

이 때 쓸 수 있는 함수가 gcc의 builtin함수로 __builtin_return_address() 입니다.

__builtin_return_address(level)

여기서 level은 call stack 에서 몇번째를 리턴할 것인지에 대한 값입니다.

__builtin_return_address(0) 하면 현재함수의 리턴주소가 나옵니다.

__builtin_return_address(1) 하면 나를 호출한 함수의 리턴주소가 나옵니다…

예제 코드를 짜봤습니다.

#include <stdio.h>
#include <stdlib.h>

int my_func1()
{
    void *addr;
    addr =
__builtin_return_address(0);
    printf(”1’s caller %p\n”,addr);
    printf(”hello 1\n”);
}
int my_func0()
{
    void *addr;
    printf(”hello 0\n”);
    addr = __builtin_return_address(0);
    printf(”0’s caller %p\n”,addr);
    my_func1();
}

int main(void)
{
    printf(”backtrace test\n”);
    printf(”main: %p\n”, (void *)main);
    printf(”my_func0: %p\n”, (void *)my_func0);
    printf(”my_func1: %p\n”, (void *)my_func1);
    my_func0();
    return 0;
}


이 소스코드를 컴파일해서 objdump해보면

080483d1 <my_func0>:

80483fc:   e8 a3 ff ff ff          call   80483a4 <my_func1>
8048401:   c9                      leave
8048402:   c3                      ret

08048403 <main>:

804845c:   e8 70 ff ff ff          call   80483d1 <my_func0>
8048461:   b8 00 00 00 00          mov    $0×0,%eax

이와 같이 호출하게 되어있고

실행해보면

backtrace test
main: 0×8048403
my_func0: 0×80483d1
my_func1: 0×80483a4
hello 0
0’s caller 0×8048461
1’s caller 0×8048401
hello 1

이렇게 나옵니다. call 바로 다음 주소–리턴 주소가 나오지요.

이외에도 몇가지 builtin함수들이 있습니다.

예를 들어 __builtin_frame_address(level)은 프레임 포인터를 반환합니다.


관련 포스트 :

gcc 컴파일 옵션으로 커스텀 프로파일 해서 실행 트레이스 뽑기

Ubuntu에서 하드디스크 사양 보기

화요일, 2월 3rd, 2009

그 용도로만 쓰는 건 아니지만 smartmon이 있습니다. (hdparm으로 못보는 LVM 으로 설정된 디스크도 잘 보이네요)

# apt-get smartmontools

# smartctl -a /dev/sda

하면 됩니다.

=== START OF INFORMATION SECTION ===
Model Family:     Western Digital Caviar RE Serial ATA series
Device Model:     WDC WD5000YS-70VJB1
Serial Number:    ……………………
Firmware Version: 00.0HPG0
User Capacity:    500,107,862,016 bytes
Device is:        In smartctl database [for details use: -P show]
ATA Version is:   7
ATA Standard is:  Exact ATA specification draft version not indicated
Local Time is:    Tue Feb  3 12:24:00 2009 KST
SMART support is: Available - device has SMART capability.
SMART support is: Enabled


http://www.howtoforge.com/checking-hard-disk-sanity-with-smartmontools-debian-ubuntu

scponly를 이용해서 sftp만 제공하고 chroot로 다른 디렉토리 접근 막기

목요일, 1월 22nd, 2009

http://ubuntuforums.org/showthread.php?t=451510 (원래 포스트)

http://geekzine.org/2007/09/28/easy-sftp-and-chroot-sftp-with-scponly/

항상 실패했었는데 좋은 패키지가 있군요

외부 사용자에게 셸은 안주고 sftp만 제공해서 다운로드/업로드만 되게 하고 싶을 때가 있습니다. ftp는 보안상 피하고 싶구요.

그때 잘 쓸 수 있겠네요.

간단하게 설명하면 (데비안/우분투 기준입니다)

1. scponly 패키지를 설치한다.

2. 거기서 제공하는 스크립트로 chroot jail을 만들고 사용자를 추가한다.

끝.

입니다.

자세한 설명은 위 링크에 돼 있구요

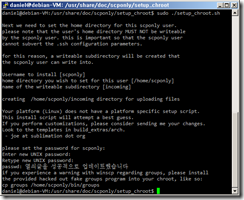
제가 한 스샷과 함께 보면,

1. scponly 패키지 설치

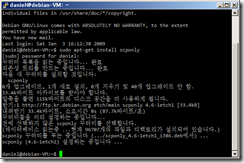
$ sudo apt-get install scponly

이러면 됩니다.

테스트로 일단 테스트할 사용자를 만들었다 치고

그 사용자의 shell을 scponly로 바꿔줍니다.

$ sudo chsh -s /usr/bin/scponly username

그리고 sftp 해보기

$ sftp username@서버

image

2. Chroot로 경로 제한해주기

chroot로 안해주면 sftp로 서버의 모든 경로를 다 이동해다닐 수 있습니다.

꼭 해줘야겠죠.

$ sudo dpkg-reconfigure -plow scponly

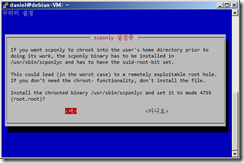
해줍니다. 그러면 뭐라뭐라 경고가 뜰텐데. chroot쓸라면 꼭 suid를 세팅 해야 하기 때문입니다. yes를 선택

image

그리고 제공된 스크립트를 압축 풀어서 실행해줍니다.

$ cd /usr/share/doc/scponly/setup_chroot
$ sudo gunzip setup_chroot.sh.gz
$ sudo chmod +x setup_chroot.sh
$ sudo ./setup_chroot.sh

실행하면 새로 추가할 사용자 이름, chroot 경로등을 물어보고 셋업해줍니다.

image

암호까지 입력했으면 이제 셋업 된 겁니다.

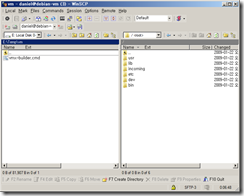
접속해봅시다 ^^

우분투에선(저는 8.04) 잘 되는데 제 VM(데비안) 오류가 나네요

아항~ 보니깐 dev/null이 없어요. 아마 데비안의 버전에서 스크립트 버그인 듯.

$ mkdir /home/scponly/dev
$ mknod -m 666 /home/scponly/dev/null c 1 3

이렇게 하니 접속 되네요.

image

그리고 유저 이름이 긴 경우인 것 같은데 winscp에서 에러메시지 같은게 납니다.(제가 테스트한 데비안 버전의 경우)

이 때는 제공된(/usr/share/doc/scponly/group.c)를 빌드해서 카피해주면 되나봐요. 그러나 쓰는 데 문제 없는 거 같아서 놔뒀습니다.

리눅스에서 태스크가 특정 코어에서 동작하게 하기 (affinity 설정)

목요일, 11월 27th, 2008

커널 2.6부터 지원됩니다.

프로세스는 sched_setaffinity()가 있습니다.

쓰레드는 pthread_setaffinity_np()가 있습니다

커널의 소스에 보면 migration하는 경우에도 cpu affinity를 보고 설정된 CPU가 아니면 하지 않습니다.

그러므로 …_setaffinity()를 호출하면 해당 CPU에 고정되는 것이 맞습니다.

Hotplug시 affinity 설정된 모든 CPU가 꺼진 경우만 예외적으로 affinity를 변경합니다.

static void sched_migrate_task(task_t *p, int dest_cpu)
{
migration_req_t req;
runqueue_t *rq;
unsigned long flags;

rq = task_rq_lock(p, &flags);
if (!cpu_isset(dest_cpu, p->cpus_allowed)
|| unlikely(cpu_is_offline(dest_cpu)))
goto out;
....
static
int can_migrate_task(task_t *p, runqueue_t *rq, int this_cpu,
struct sched_domain *sd, enum idle_type idle,
int *all_pinned)
{
/*
* We do not migrate tasks that are:
* 1) running (obviously), or
* 2) cannot be migrated to this CPU due to cpus_allowed, or
* 3) are cache-hot on their current CPU.
*/
if (!cpu_isset(this_cpu, p->cpus_allowed))
return 0;

아래 코드를 2.6.24, x86, 4코어에서 테스트했습니다.

( http://www.thinkingparallel.com/2006/08/18/more-information-on-pthread_setaffinity_np-and-sched_setaffinity/ 에 나온 코드를 컴파일 되도록 수정 )

/* Short test program to test the pthread_setaffinity_np
* (which sets the affinity of threads to processors).
* Compile: gcc pthread_setaffinity_np_test.c
*            -o pthread_setaffinity_np_test -lm -lpthread
* Usage: ./pthread_setaffinity_test
*
* Open a "top"-window at the same time and see all the work
* being done on CPU 0 first and after a short wait on CPU 1.
* Repeat with different numbers to make sure, it is not a
* coincidence.
*/
#include <stdio.h>
#include <math.h>
#include <unistd.h>
#define __USE_GNU
#include <pthread.h>
double waste_time(long n)
{
double res = 0;
long i = 0;
while (i <n * 200000) {
i++;
res += sqrt(i);
}
return res;
}
void *thread_func(void *param)
{
unsigned long mask = 1; /* processor 0 */
/* bind process to processor 0 */
if (pthread_setaffinity_np(pthread_self(), sizeof(mask), (cpu_set_t *)&mask) <0) {
perror("pthread_setaffinity_np");
}
/* waste some time so the work is visible with "top" */
printf("result: %f\n", waste_time(2000));
mask = 2;   /* process switches to processor 1 now */
sleep(2);
if (pthread_setaffinity_np(pthread_self(), sizeof(mask), (cpu_set_t *)&mask) <0) {
perror("pthread_setaffinity_np");
}
/* waste some more time to see the processor switch */
printf("result: %f\n", waste_time(2000));
return 0;
}
int main(int argc, char *argv[])
{
pthread_t my_thread;
if (pthread_create(&my_thread, NULL, thread_func,
NULL) != 0) {
perror("pthread_create");
}
//pthread_exit(NULL);
pthread_join(my_thread, NULL);
return 0;
}

———————————

프로세스의 경우 소스는 다음과 같습니다.

/* Short test program to test sched_setaffinity
* (which sets the affinity of processes to processors).
* Compile: gcc sched_setaffinity_test.c
*            -o sched_setaffinity_test -lm
* Usage: ./sched_setaffinity_test
*
* Open a "top"-window at the same time and see all the work
* being done on CPU 0 first and after a short wait on CPU 1.
* Repeat with different numbers to make sure, it is not a
* coincidence.
*/
#include <stdio.h>
#include <math.h>
#include <unistd.h>
#define __USE_GNU
#include <sched.h>
double waste_time(long n)
{
double res = 0;
long i = 0;
while(i <n * 200000) {
i++;
res += sqrt (i);
}
return res;
}
int main(int argc, char **argv)
{
unsigned long mask = 1; /* processor 0 */
/* bind process to processor 0 */
if (sched_setaffinity(0, sizeof(mask), (cpu_set_t*)&mask) <0) {
perror("sched_setaffinity");
}
/* waste some time so the work is visible with "top" */
printf ("result: %f\n", waste_time (2000));
mask = 2; /* process switches to processor 1 now */
if (sched_setaffinity(0, sizeof(mask), (cpu_set_t*)&mask) <0) {
perror("sched_setaffinity");
}
/* waste some more time to see the processor switch */
printf ("result: %f\n", waste_time (2000));
return 0;
}
ubuntu 리눅스 커스텀 커널 컴파일 하기

목요일, 8월 28th, 2008

사용하는 머신의 램이 8기가인데 우분트 웍스테이션의 기본 커널이 4기가까지 지원이라 커널을 새로 빌드해야 할 일이 있었습니다.


우분투에서 채용된 원래 커널 소스에 설정을 가지고 램 설정만 바꿔서 컴파일했습니다.


다음은 하는 방법입니다.

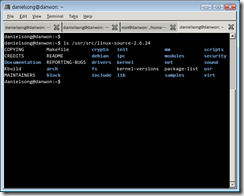
1. 커널 소스 구하기

우분투는 데비안 계열이니 바로 소스 설치 가능합니다.

그리고 커널은 특별히 소스 패키지 이름이 따로 있습니다.

$ sudo apt-get install linux-source

그러면 /usr/src 아래에 깔립니다.

image


2. 커널 개발용 패키지 설치

개발용 패키지를 미리 다 받아둔다기 보단 필요한 패키지가 있다고 에러 메시지가 나므로, 그 때 설치했습니다.

예를 들어,

$ sudo apt-get install kernel-package libncurses5-dev fakeroot wget bzip2 kernel-wedge xmlto


3. configuration 복사해오기

이제 지금 돌고 있는 커널의 소스를 받았으니 configuration을 복사해 와야겠지요

이제부턴 편의를 위해 루트로 작업하겠습니다.

$ sudo su

# cp /boot/config-2.6.24-19-generic linux-2.4.24/config_old


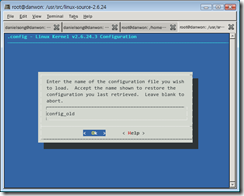
4. make menuconfig (-> configuration)

# make menuconfig

그리고 Load an Alternate Configuration File를 선택해서 config_old를 불러옵니다.

image

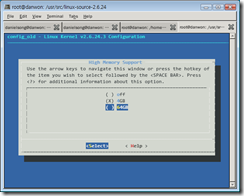
그리고 저 같은 경우 여기서 하나만 바꾸면 됩니다.

Processor type and features -> High Memory Support (4GB)

이렇게 돼 있는 걸 64GB로 바꿉니다.

image

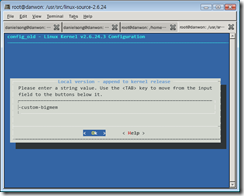
그리고 추가로 General setup 에서 Local version - append to kernel release 항목을 고쳐주면 커널의 정보에서 이름이 추가됩니다.

예를 들어 -custom-bigmem 로 써주면 되지요. (실제 제가 할 때는 -를 앞에 빼먹고 custom-bigmem으로 썼습니다. -가 자동으로 붙는 줄 알았어요…)

image

그리고 exit. 저장하고 나옵니다.


5. 컴파일 && deb 패키지 생성

이제 빌드해봅니다.

# make-kpkg clean

# fakeroot make-kpkg  –initrd kernel_image kernel_headers

이렇게 하면 주욱 빌드할 것이고 커널 헤더와 커널 이미지 패키지가 만들어집니다.


6. 새로운 커널 설치

만들어진 패키지를 설치해줍니다.

# dpkg -i linux-image-2.6.24.3custom-bigmem_2.6.24.3-custom-bigmem-10.00.Custom_i386.deb 
# dpkg -i linux-headers-2.6.24.3custom-bigmem_2.6.24.3-custom-bigmem-10.00.Custom_i386.deb


7. 재부팅

일단 /boot/grub/menu.lst 에 부팅 설정이 제대로 써졌는지 보고, (저의 경우 새 커널로 부팅하도록 우선순위가 자동으로 매겨져서 추가돼 있더군요.)

재부팅

# reboot


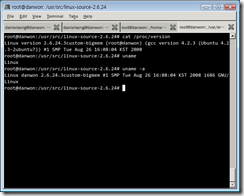
부팅하고나서 현재 커널이 어떤 건지 확인하려면 uname -a나 /proc/version을 보시면 됩니다.

# uname -a
Linux danwon 2.6.24.3custom-bigmem #1 SMP Tue Aug 26 16:08:04 KST 2008 i686 GNU/Linux

image

nload 콘솔에서 네트웍 부하 보기

화요일, 8월 26th, 2008

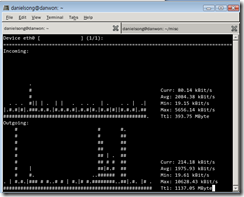
nload 라는 프로그램이 있습니다.

image

네트웍 부하를 콘솔에서 볼 수 있습니다.

원격으로 관리할 때 편리하겠네요.


관리하는 서버에서 누군가 네트웍을 심하게 쓰는군요. 음. 살펴봐야겠습니다.

예약한 시각에 명령어 실행하기 - at

금요일, 8월 15th, 2008

학교가 토요일에 정전된다길래 정전 되기 직전에 리눅스 서버를 꺼줘야겠습니다.

제가 직접 가서 꺼야되는 상황은 만들고 싶지 않기에 예약해서 꺼야겠지요

이럴 때 쓰기 쉬운 명령어, at가 있습니다.

이대로 따라 하면 됩니다.

리눅스에서 컴퓨터 끄기 예약.

지정된 시간에 자동으로 끄려면 at를 사용하면 됩니다.

0. 먼저 시스템 시간을 확인합니다. 시간과 날짜가 맞아야지요.

$ date

2008. 08. 14. (목) 21:38:27 KST

1. 루트로 변경합니다. (끄려면 권한이 있어야 하므로)

daniel@server $su

root@server #

su가 안되는 시스템에서는 sudo su로 사용자를 바꾸실 수 있을 겁니다. 안되면 루트로 로그인하시든지요.

daniel@server $ sudo su

root@server #

2. at으로 시간 입력 & 할 일 입력

root@server # at 8:30am Aug 16

warning: commands will be executed using /bin/sh

at> poweroff (혹시 poweroff가 아니고 다른 명령 – 예를 들어 shutdown –h now – 인지는 알아서 확인)

at> (Ctrl+D입력으로 종료)

job 1 at Thu Aug 16 08:30:00 2008

  • atq로 예약된 명령을 볼 수 있습니다.

root@server # atq

1       Thu Aug 16 08:30:00 2008 a danielsong

  • atrm으로 예약 명령을 취소할 수 있습니다.

root@server # atrm 1

추가 정리하자면,

1. at 명령어로 원하는 시간에 명령을 실행할 수 있다. (명령은 한줄이 아니어도 됨.)

2. 그리고 입력받는  시간 형식은 다양해서 at 4pm + 3 days , at 1am tomorrow 등으로 입력도 가능.

ubuntu에서 firewall 설정

목요일, 8월 14th, 2008

ubuntu linux에는 처음에 기본적으로 firewall을 작동시키지 않습니다.

iptables를 이용한 firewall 셋업은 원래 좀 피곤합니다. 이걸 GUI로 쉽게 해주는 툴이 있으면 좋겠는데요

찾아보면 많아서 뭘 써야할 지 모르는데, 인터넷 검색으로 추천하는 툴을 찾았습니다.

(http://linuxappfinder.com 라는 사이트에서 카테고리별로 브라우즈 할 수 있습니다. 랭크가 나와요)

기본 기능만 원한다면 firestarter를,

좀더 자세한 기능을 쓰려면 Guarddog을,

더 강력한 그리고 복잡한 기능을 쓰려면 fwbuilder를 쓰라는군요

예전에 iptables를 직접 스크립트를 작성해서 써봤지만 이번엔 간단하게 가고 싶어서 firestart를 썼습니다.

http://useopensource.blogspot.com/2007/03/how-to-setup-firewall-in-ubuntu.html 이쪽 링크에 잘 나옵니다.

설치방법은

$ sudo apt-get install firestarter

이렇게 하면 됩니다.

실행은

$ sudo firestarter

하시면 되구요

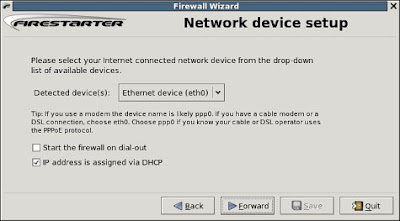
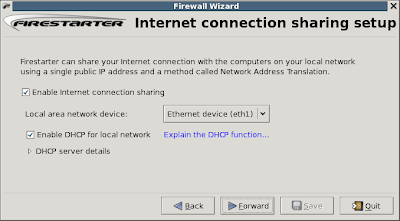
처음에 간단한 기능만 물어보는 마법사가 뜨고, Next Next로 설정하고 나면


image

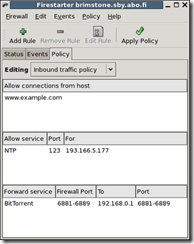
이런 모양으로 나옵니다.

Policy 탭에서 열기 원하는 포트와 ip주소를 적어주고, Start Firewall 버튼을 눌러 활성화시키면 됩니다.

image

ps. 참고로 Lock Firewall 버튼은 누르지 마세요. 모든 통신을 끊어버립니다. 원격으로 실행하다가 이걸 누르면 서버 콘솔까지 달려가야 됩니다.

나머지 설명은 여기 링크에서 읽어보세요.

나머지 Guarddog, fwbuilder 도 위 링크에서 읽어보시기 바랍니다.

Interactive linux kernel map

월요일, 6월 9th, 2008

image

http://www.makelinux.net/kernel_map