정말 단순한 점 그래프만 그릴거라면
텍스트 파일에 컬럼으로 쭉 덤프된 파일 만들고
$ gnuplot
#gnuplot 프롬프트에서
# plot "dump.txt" u 1:2 title "column2", "dump.txt" u 1:3 title "column3"
이런식으로 쓰면 됨.
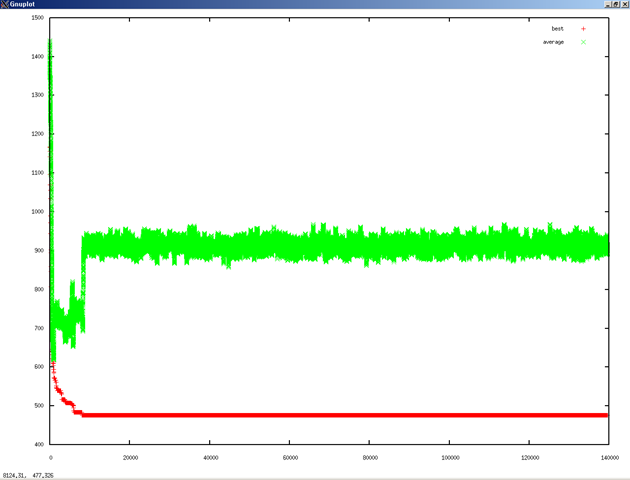
이 그림은
plot "r30.txt" u 1 title "best", "r30.txt" u 2 title "average"
plot 커맨드를 파일에서 입력해 그리고자 한다면
echo "plot \"${PLOT_FILE}\" u 1 title \"best\", \"${PLOT_FILE}\" u 2 title \"average\"" > plot.cmd
gnuplot -persist plot.cmd
이런식으로 하면 된다.
-persist는 플롯을 그리고 나서 종료되어도 플롯 그림은 그대로 남아있게 하는 옵션이다.
 I was senseless and ignorant; I was a brute beast before you.
Yet I am always with you; you hold me by my right hand.
You guide me with your counsel, and afterward you will take me into glory.
Whom have I in heaven but you?
I only have you in my life
I was senseless and ignorant; I was a brute beast before you.
Yet I am always with you; you hold me by my right hand.
You guide me with your counsel, and afterward you will take me into glory.
Whom have I in heaven but you?
I only have you in my life