wubi-ubuntu installer 가 뭔가 했더니

Posted at 2009/03/18 01:22 // in Tips/Utility programs // by Daniel

Wubi Logo

우분투 인스톨러라 돼 있는데

뭔가 했지요

이번에 노트북에 설치해보니까

WUBI란 ubuntu 리눅스를 윈도우의 ntfs 위에서 돌리도록 세팅해주는 프로그램입니다.

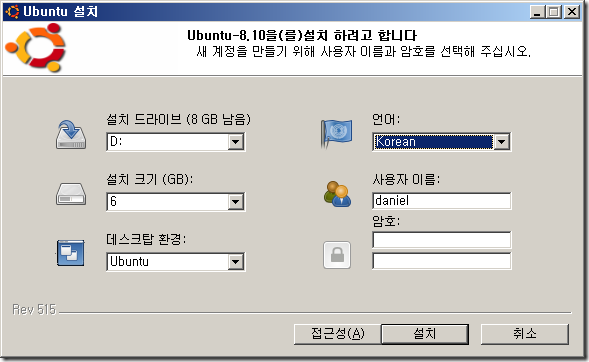
image


설치하면 해 주는 일은

1) C또는 D 드라이브(NTFS)에 가상 이미지 파일을 만들어서 디스크로 사용하게 만든다.

2) 윈도우의 부트로더에 ubuntu로의 부팅을 메뉴로 넣어준다.

3) 이 메뉴를 선택하면 NTFS상의 이미지 파일을 파일시스템으로 인식하여 부팅을 하게 한다.

입니다.

그래서 파티션을 건드리지 않고 단지 윈도우 부트로더에 메뉴를 추가하는 것으로 듀얼부트가 됩니다.

일단 부트되고나면 파티션이 윈도우용인 NTFS 파티션 위에 한 파일을 가상으로 EXT3 디스크로 쓰는 것 뿐 일반적인 리눅스 시스템과 동일합니다.

아이디어 괜찮네요

단점은

1. NTFS위에서 한 파일을 가상으로 디스크로 잡는 거라서 파일시스템 오버헤드(속도)가 좀 있음. NTFS->EXT3로 쓰기 때문입니다.

2. 파일(디스크이미지)이 뻑나면 복구가 일반적인 방법으로 안됨

이랍니다.


그리고

비스타에서 아직 문제 있음.

현재 있는 8.04도 그렇고 8.10도 그렇고

비스타에서 문제는

1. WUBI 실행하고 설치시 office IME랑 충돌나서 죽어버림.

실행하자마자 죽어버리는데 IME옵션에서 Microsoft IME로 바꿔주면 안죽습니다.

설치 이후에는 어차피 듀얼부트니까 상관없구요.

2. 설치하고 나면 부트로더에 메뉴가 추가돼야 되는데 안돼있습니다.

그래서 수동으로 부트메뉴를 설치해야 함. http://stardust99.blogspot.com/2009/02/wubi-install-on-windows-vista-sp1.html 에서 가져왔습니다.

1. 먼저 IME를 Office 2007 IME 대신 Microsoft IME로 바꾼다.
2. Vista에서 Kubuntu를 설치한다. 원래라면 여기서 설치가 끝나고 모든게 해피하게 되어야 하나, 나의 경우는 그렇지 않았다. 부트메뉴에 아무것도 나타나지 않았고, Windows Vista로만 부팅이 되었다.
3. EasyBCD를 다운받아서 깔고, Linux/Wubi를 고르면 NeoGrub을 깔면서 Grub을 사용할 수 있다.
4. 그.러.나. 이 버전의 Grub은 root ()/ubuntu/disks와 같은 것을 처리하지 못한다. 설정 파일을 살펴보면 c:\NST\NeoGrub.mbr을 통해 부팅을 시키는 것을 알 수 있는데, 이것을 wubildr.mbr로 바꿔치기를 한다. wubildr.mbr은 c:\에 있다.
4. wubildr.mbr을 c:\NST\NeoGrub.mbr에 Overwrite한다.
5. c:\ubuntu\disks\boot\grub\menu.lst를 c:\NST\menu.lst로 복사한다.
(install의 경우 c:\ubuntu\disks\install\boot\grub\menu.lst이던가 하는 것을 복사해주면 될 것이다.)

다시 설명하면 EasyBCD를 설치하고 grub을 부트메뉴에 설치, 설치한 .mbr 파일을 ubuntu용으로 교체, menu.lst파일 찾아서 복사해줌. ubuntu\disks\install\boot\grub\menu.lst 를 복사하면 되더군요.

크리에이티브 커먼즈 라이센스
Creative Commons License

gizmosms 해외에 문자보내기

Posted at 2009/03/02 18:22 // in Tips // by Daniel

http://www.gizmosms.com/

image

http://paperinz.com/789 에 나온 겁니다.

Gizmo SMS 는 인터넷 웹사이트에서 무료로 문자를 보낼 수 있는 곳이다  재미있는 점은 세계 50여개국에 어떤 핸드폰이든 상관없이 문자를 보낼 수 있다는 점이다  게다가 회원가입도 필요없고 이메일 조차 요구하지 않는다

크리에이티브 커먼즈 라이센스
Creative Commons License

awk 에서 shell 변수 사용하기

Posted at 2009/02/13 19:56 // in Tips/Utility programs // by Daniel
awk 에서 shell 변수 사용하기 - http://devfrog.egloos.com/293560

#!/bin/sh
if [ $# -ne 4 ]
then
    echo "Usage: log_cnt <file_name> <err_code> <log_point|0> <proc_hour>"
    exit
fi
cnt=1
if [ $3 -ne 0 ]
then
cat $1 | awk 'BEGIN{FS=";"}{ if ( $10 == '"${2}"' && $7 == '"${3}"' ) print }' | grep ^$4 | wc -l
else
while [ "$cnt" -ne 5 ]
do
    echo "log point $cnt: c"
    cat $1 | awk 'BEGIN{FS=";"}{ if ( $10 == '"${2}"' && $7 == '"${cnt}"' ) print }' | grep ^$4 | wc -l
    cnt=`expr $cnt + 1`
done
fi
-----
shell script 에서 awk 표현식 안에서 shell 의 input parameter 를 쓸 경우가 있다.
이때, awk 에서 shell 변수로 인식시키기 위해서는 ' " ${변수명} "  ' 과 같은 방식으로 사용해야 한다.

크리에이티브 커먼즈 라이센스
Creative Commons License

bash wait 명령어

Posted at 2009/02/11 11:15 // in Tips/Utility programs // by Daniel

bash 스크립트에서 백그라운드로 실행시키는 스크립트가 있을 때 그 스크립트의 종료를 기다려 처리하고 싶은 일이 있을 때가 있죠

그때 쓰는 게 wait입니다.

#!/bin/sh
./sort_db.sh &
echo "1st Line"
./bkptmp.sh &
echo "2dn line"
wait
echo "Some operation will follow this"

이런식으로 쓰면 됩니다. &로 백그라운드 실행한 스크립트를 기다려줍니다.

http://unstableme.blogspot.com/2008/06/bash-wait-command.html

Task contention상황에서 QoS를 위한 연구를 하는 중인데 스크립트로 돌리려니 이게 필요해서 찾아봤습니다.

크리에이티브 커먼즈 라이센스
Creative Commons License

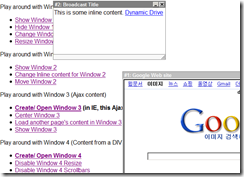
dhtml윈도로 창 안의 팝업창 만들기

Posted at 2009/02/09 11:01 // in Tips/Web // by Daniel

http://www.dynamicdrive.com/

여기서 검색하면 됩니다.

image

크리에이티브 커먼즈 라이센스
Creative Commons License

쿠키 사용 - 체크시 오늘 하루동안 새창 열지 않기

Posted at 2009/02/09 10:58 // in Tips/Web // by Daniel

http://webnoon.net/entry/%EC%B2%B4%ED%81%AC%EC%8B%9C-%EC%98%A4%EB%8A%98-%ED%95%98%EB%A3%A8%EB%8F%99%EC%95%88-%EC%83%88%EC%B0%BD-%EC%97%B4%EC%A7%80-%EC%95%8A%EA%B8%B0


set cookie, get cookie가 관건

나머지는 통상적인 자바문법

크리에이티브 커먼즈 라이센스
Creative Commons License

Ubuntu에서 하드디스크 사양 보기

Posted at 2009/02/03 12:26 // in Tips // by Daniel

그 용도로만 쓰는 건 아니지만 smartmon이 있습니다. (hdparm으로 못보는 LVM 으로 설정된 디스크도 잘 보이네요)

# apt-get smartmontools

# smartctl -a /dev/sda

하면 됩니다.

=== START OF INFORMATION SECTION ===
Model Family:     Western Digital Caviar RE Serial ATA series
Device Model:     WDC WD5000YS-70VJB1
Serial Number:    ........................
Firmware Version: 00.0HPG0
User Capacity:    500,107,862,016 bytes
Device is:        In smartctl database [for details use: -P show]
ATA Version is:   7
ATA Standard is:  Exact ATA specification draft version not indicated
Local Time is:    Tue Feb  3 12:24:00 2009 KST
SMART support is: Available - device has SMART capability.
SMART support is: Enabled
...


http://www.howtoforge.com/checking-hard-disk-sanity-with-smartmontools-debian-ubuntu

크리에이티브 커먼즈 라이센스
Creative Commons License

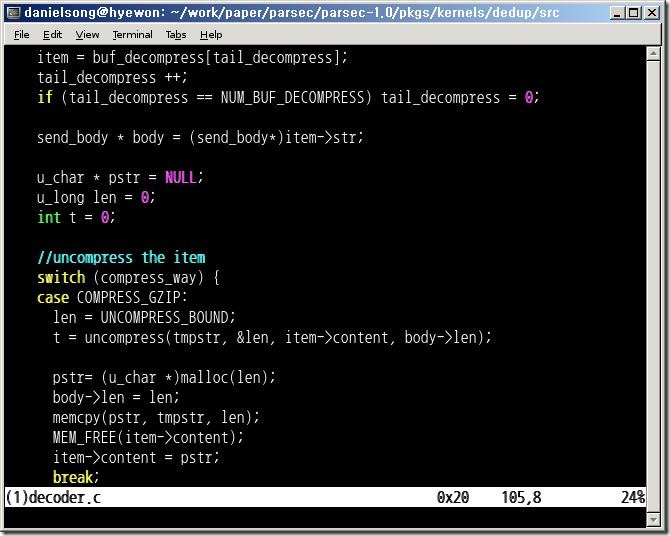
나눔코딩폰트

Posted at 2009/01/23 15:54 // in Tips // by Daniel
개발자용 나눔고딕 코딩글꼴 공개~ 에서 보고 테스트해봤습니다.

콘솔라스 쓰다가 써본 첫 느낌은

위아래로 길다.

폭이 좁아서 폰트를 기존 12에서 14로 키워서 쓰는 게 눈이 편하군요.

약간의 버그?

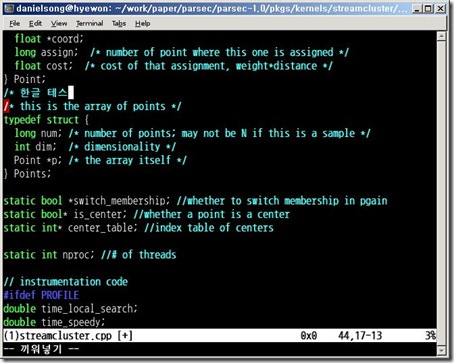
Xming + gnome-terminal에서 쓰니 셸에서 커서를 움직일 때 화살표키로 움직이면 커서 너비가 두배로 보입니다.

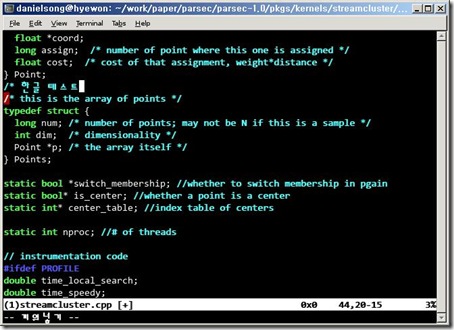
한글은 확실히 예쁘다

기존 영문 폰트들에 비해 역시 한글이 들어있으니, 미려하게 나옵니다.

nanum_gnome

그림 설명 : Xming + Gnome-terminal 입니다. 폰트크기 14. 옆으로 좁고 위아래가 깁니다.


nanum_gnome_cursor

그림 설명 : 커서 버그? 일지도 모르겠습니다. consolas 쓰면 안그런데
(해결방법을 찾았습니다.http://kldp.org/node/102183#comment-473768
.fonts.conf에
 <match target="font">
<test name="family"><string>나눔고딕_코딩</string><string>NanumGothic_Coding</string></test>
<edit name="globaladvance"><bool>false</bool></edit>
</match>
추가하면 됨.

nanum_gnome_hangul

그림 설명 : 한글은 확실히 맘에 듭니다.

비교군으로 콘솔라스 쓴 화면. (한글 폰트는 뭐더라??..)

consolas_gnome_hangul

크리에이티브 커먼즈 라이센스
Creative Commons License

scponly를 이용해서 sftp만 제공하고 chroot로 다른 디렉토리 접근 막기

Posted at 2009/01/22 15:56 // in Tips // by Daniel

http://ubuntuforums.org/showthread.php?t=451510 (원출처 포스트)

http://geekzine.org/2007/09/28/easy-sftp-and-chroot-sftp-with-scponly/

항상 실패했었는데 좋은 패키지가 있군요

외부 사용자에게 셸은 안주고 sftp만 제공해서 다운로드/업로드만 되게 하고 싶을 때가 있습니다. ftp는 보안상 피하고 싶구요.

그때 잘 쓸 수 있겠네요.

간단하게 설명하면 (데비안/우분투 기준입니다)

1. scponly 패키지를 설치한다.

2. 거기서 제공하는 스크립트로 chroot jail을 만들고 사용자를 추가한다.

끝.

입니다.

자세한 설명은 위 링크에 돼 있구요

제가 한 스샷과 함께 보면,

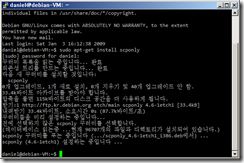
1. scponly 패키지 설치

$ sudo apt-get install scponly

이러면 됩니다.

테스트로 일단 테스트할 사용자를 만들었다 치고

그 사용자의 shell을 scponly로 바꿔줍니다.

$ sudo chsh -s /usr/bin/scponly username

그리고 sftp 해보기

$ sftp username@서버

image

2. Chroot로 경로 제한해주기

chroot로 안해주면 sftp로 서버의 모든 경로를 다 이동해다닐 수 있습니다.

꼭 해줘야겠죠.

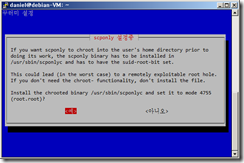
$ sudo dpkg-reconfigure -plow scponly

해줍니다. 그러면 뭐라뭐라 경고가 뜰텐데. chroot쓸라면 꼭 suid를 세팅 해야 하기 때문입니다. yes를 선택

image

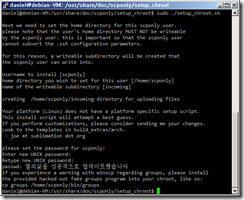
그리고 제공된 스크립트를 압축 풀어서 실행해줍니다.

$ cd /usr/share/doc/scponly/setup_chroot
$ sudo gunzip setup_chroot.sh.gz
$ sudo chmod +x setup_chroot.sh
$ sudo ./setup_chroot.sh

실행하면 새로 추가할 사용자 이름, chroot 경로등을 물어보고 셋업해줍니다.

image

암호까지 입력했으면 이제 셋업 된 겁니다.

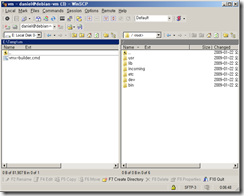
접속해봅시다 ^^

우분투에선(저는 8.04) 잘 되는데 제 VM(데비안) 오류가 나네요

아항~ 보니깐 dev/null이 없어요. 아마 데비안의 버전에서 스크립트 버그인 듯.

$ mkdir /home/scponly/dev
$ mknod -m 666 /home/scponly/dev/null c 1 3

이렇게 하니 접속 되네요.

image

그리고 유저 이름이 긴 경우인 것 같은데 winscp에서 에러메시지 같은게 납니다.(제가 테스트한 데비안 버전의 경우)

이 때는 제공된(/usr/share/doc/scponly/group.c)를 빌드해서 카피해주면 되나봐요. 그러나 쓰는 데 문제 없는 거 같아서 놔뒀습니다.

크리에이티브 커먼즈 라이센스
Creative Commons License

/proc/meminfo 내용 [Red Hat] 자료

Posted at 2009/01/20 20:32 // in Tips // by Daniel

출처 : http://www.redhat.com/docs/manuals/enterprise/RHEL-4-Manual/en-US/Reference_Guide/s2-proc-meminfo.html

/proc/meminfo 내용

This is one of the more commonly used files in the /proc/ directory, as it reports a large amount of valuable information about the systems RAM usage.

The following sample /proc/meminfo virtual file is from a system with 256 MB of RAM and 512 MB of swap space:

         MemTotal: 255908 kB MemFree: 69936 kB Buffers: 15812 kB Cached: 115124 kB SwapCached: 0 kB Active: 92700 kB Inactive: 63792 kB HighTotal: 0 kB HighFree: 0 kB LowTotal: 255908 kB LowFree: 69936 kB SwapTotal: 524280 kB SwapFree: 524280 kB Dirty: 4 kB Writeback: 0 kB Mapped: 42236 kB Slab: 25912 kB Committed_AS: 118680 kB PageTables: 1236 kB VmallocTotal: 3874808 kB VmallocUsed: 1416 kB VmallocChunk: 3872908 kB HugePages_Total: 0 HugePages_Free: 0 Hugepagesize: 4096 kB 

Much of the information here is used by the free, top, and ps commands. In fact, the output of the free command is similar in appearance to the contents and structure of /proc/meminfo. But by looking directly at /proc/meminfo, more details are revealed:

  • MemTotal — Total amount of physical RAM, in kilobytes.

  • MemFree — The amount of physical RAM, in kilobytes, left unused by the system.

  • Buffers — The amount of physical RAM, in kilobytes, used for file buffers.

  • Cached — The amount of physical RAM, in kilobytes, used as cache memory.

  • SwapCached — The amount of swap, in kilobytes, used as cache memory.

  • Active — The total amount of buffer or page cache memory, in kilobytes, that is in active use. This is memory that has been recently used and is usually not reclaimed for other purposes.

  • Inactive — The total amount of buffer or page cache memory, in kilobytes, that are free and available. This is memory that has not been recently used and can be reclaimed for other purposes.

  • HighTotal and HighFree — The total and free amount of memory, in kilobytes, that is not directly mapped into kernel space. The HighTotal value can vary based on the type of kernel used.

  • LowTotal and LowFree — The total and free amount of memory, in kilobytes, that is directly mapped into kernel space. The LowTotal value can vary based on the type of kernel used.

  • SwapTotal — The total amount of swap available, in kilobytes.

  • SwapFree — The total amount of swap free, in kilobytes.

  • Dirty — The total amount of memory, in kilobytes, waiting to be written back to the disk.

  • Writeback — The total amount of memory, in kilobytes, actively being written back to the disk.

  • Mapped — The total amount of memory, in kilobytes, which have been used to map devices, files, or libraries using the mmap command.

  • Slab — The total amount of memory, in kilobytes, used by the kernel to cache data structures for its own use.

  • Committed_AS — The total amount of memory, in kilobytes, estimated to complete the workload. This value represents the worst case scenario value, and also includes swap memory.

  • PageTables — The total amount of memory, in kilobytes, dedicated to the lowest page table level.

  • VMallocTotal — The total amount of memory, in kilobytes, of total allocated virtual address space.

  • VMallocUsed — The total amount of memory, in kilobytes, of used virtual address space.

  • VMallocChunk — The largest contiguous block of memory, in kilobytes, of available virtual address space.

  • HugePages_Total — The total number of hugepages for the system. The number is derived by dividing Hugepagesize by the megabytes set aside for hugepages specified in /proc/sys/vm/hugetlb_pool. This statistic only appears on the x86, Itanium, and AMD64 architectures.

  • HugePages_Free — The total number of hugepages available for the system. This statistic only appears on the x86, Itanium, and AMD64 architectures.

  • Hugepagesize — The size for each hugepages unit in kilobytes. By default, the value is 4096 KB on uniprocessor kernels for 32 bit architectures. For SMP, hugemem kernels, and AMD64, the default is 2048 KB. For Itanium architectures, the default is 262144 KB. This statistic only appears on the x86, Itanium, and AMD64 architectures.

크리에이티브 커먼즈 라이센스
Creative Commons License
1 ... 3 4 5 6 7 8 9 10 11 ... 13